Workshop updates

Tuning

Tuning

Tonight we focused on our tuning. We started off by playing a G scale, played in lower octave. We played long slow notes, concentrating on blending and playing in tune with the others around us. Then we did the same thing playing the G scale in the upper octave. We played both octaves together, with alternate people round the room playing each octave, so we could hear our own sound more clearly. We followed this by playing both octaves of the G scale with the players in between playing the G scale in harmony. the we added in a couple of people playing an open G drone. The fiddlers playing drone worked on tone, and keeping smooth transitions between down and up bows, while those playing the scale and harmony were focusing on playing in tune.

We played the G arpeggio in both octaves, to identify the notes – G,B, D and G. Then we created a plucked riff, using just the notes from the arpeggio. One person started with a 4 beat riff, then each person round the circle added their own riff on top. We tried the same thing again, using bowed notes from the scale of G.

We played Sitting in the Stern of a boat, thinking about tuning

Then we moved into the large room, without our fiddles, and did a short Interplay exercise. We started off by walking around the room, exploring the space. Then we tried either walking or stopping, so we had 2 choices. We added in walking fast or slow, and played around with these options. The we added in the option of following what someone else was doing. This was an easy way to explore some of the options that are open to us when we start improvising with music.

Playing around with walking

We returned to our fiddles and tried a new riff, with each person in the circle adding to the basic starting riff. We tried stopping for 4 beats, then starting the riff again – that took a bit of concentration if your own riff didn’t start on the first of the 4 beats. People also tried following what someone else was playing, then varying it. We fed back in pairs, then to the group.

We played through Sitting in the Stern of a Boat again, and also had time to play Young Betty before heading off to the pub.

Next week is the last week of term.


Using the 4th finger

Using the 4th finger in fiddle playing

The 4th finger of the left hand doesn’t get much of a workout in ordinary life. In fact, unless you are a touch typist or you play another instrument, you may find you almost never use it in isolation. So it’s no surprise that when we try to use it to play the fiddle, it’s a little out of shape.

Part of getting comfortable with using the fourth finger when playing fiddle tunes is about building up strength and flexibility in the finger. So we started tonight’s class with some exercises to stretch and strengthen the fourth finger. Here are a couple that can be done anywhere, without needing your fiddle. Hold up your bowing hand, and bending each finger in turn, stretch them as far down the base of the thumb as you can reach.

And this one helps with moving the fingers of the left hand independently: holding the palm up, facing towards you, try keeping the 1st, 2nd and 3rd fingers together, and moving the pinkie independently. Then try keeping the 1st and 2nd fingers together, and the 3rd and 4th fingers together, and separate both pairs in the middle. Lastly, try keeping the 2nd, 3rd and 4th fingers together, and  move the index finger independently.

Then we moved onto an exercise on the fiddle. This one incorporates thinking about tuning when playing with the 4th finger, which is often an issue when you first start using it in your playing. Make sure your fiddle is in tune before you do this one! When placing the 4th finger down on a string, it should come down onto the string from above, rather than stretching out along the string. You can achieve this position by bending the last joint near the tip of the finger. Moving the elbow over to the right (if you’re using your left hand on the strings) will also give you a bit more stretch so you can reach a little further up the string with the fourth finger.

We played up the A string AAAA, BBBB, C#C#C#C#, DDDD, EEEE. When we got to the E, we played it with the 4th finger on the A string, and played a chord with the open E string. This allowed us to check the tuning of the 4th finger E. If you struggle to stretch the pinkie far enough to play the note in tune, you can also flex the wrist a little as you stretch for the 4th finger note – this will give you a little more reach than just stretching the finger alone.

Doing a short session of exercises like these every day for a week or two will make a big impact on being able to use the 4th finger with confidence.

We learnt the air Sitting in the Stern of a Boat, which uses the 4th finger in the B part.

We also worked on creating a full tone on the fiddle,  spent some time working on creating clearer snaps in the strathspey we learnt a couple of weeks ago, and revisited the steps for learning to play with vibrato.


Here’s a recording of Paul Anderson playing Sitting in the Stern of a Boat. His wrist in his bowing arm is very relaxed, and he’s making use of the full length of his bow throughout the tune.


Working on tone on the fiddle
Photo ©Ros Gasson

Tidy playing

Tidy playing

Tonight we learnt the tune Young Betty by Mairi Campbell. We spent some time working on controlling the volume of our playing, trying out playing long open strings as quietly as possible, taking a lot of the weight of the bow from the string by using a bit of pressure with the pinkie. Then we tried playing really loud notes, using pressure with the first finger on the stick of the bow, and transferring the weight of the arm into the bow.

There are several points in the tune where we tried out separating pairs of the same note with a grace note. We emphasised the second note in the pair when we were doing this. we also worked on a bit of bowing in the B part, bowing this phrase down, up, up, up, down. We made the 3 up bows short staccato notes.

We ended the evening by playing through the tunes we have learnt this term.


Working on playing in Tune

Playing in Tune

Tonight we started by learning a harmony to go with the tune we learnt last week. The written music for the harmony is on the music page. We tried playing the harmony along with the tune, with half the class playing the harmony. Then we switched over, so the other half played it. Once we’d done that, we tried alternate people round the room playing the harmony, and also had a go at playing the harmony down an octave.

Then we revisited the embellishments we added to the tune last week. After that, we spent some time thinking about playing in tune with one another. We played through the tune and harmony (alternate people round the room playing harmony or tune) really focusing on what the person on either side was playing, and concentrating on playing in tune with them.

Then we took the notes D, F#, A, and tried playing any one of these notes, in any octave, again listening to the players on either side, and working on playing in tune with them. We tried moving around the room while we did this too. After that, we did much the same thing, in smaller groups, so it was easier to hear. We started with 4 people who were sitting beside each other in the circle. Each of the four played one of the notes as a drone, using long slow bow strokes, and worked on tuning together with the other 3 people. After a short while, the next person round the room joined in, and the first person dropped out. The drones moved around the circle slowly, as each new person joined in. We noticed that as this went round the circle for the second time, our tuning was much better. It’s a useful exercise in really listening to how we’re making music together.

We also talked briefly about the notes that make up a chord. These are the 1st, 3rd, 5th and 8th notes in a scale (which is also often referred to as an arpeggio). For the notes we picked for the exercise above, they form the chord or arpeggio for the scale of D (D = 1st note, F# = 3rd note, A = 5th Note, and a D at the top of the octave would be the 8th note). For anyone wanting to know more about written music, and some basic theory, the book Beginning to Read Music, written by Sarah Northcott, is a really helpful introduction, which explains things clearly, while managing to avoid jargon.

For practicing at home, one thing that can make a huge difference to learning is to play and record yourself regularly. Spend some time doing this, and then listen back to what you have recorded. When we’re playing, and focusing on learning a new bit of technique, it’s very difficult to give your full attention to also listening to the sounds you’re producing. If you record and listen regularly, you’re giving yourself an opportunity for instant feedback on the effect of any changes you make to your technique.

We finished off the evening by playing through Paddy’s trip to Scotland together

Playing in tune
Photo ©Ros Gasson

Embellishing tunes

Embellishing tunes

Tonight we learnt the jig Dhu Hill. It’s a 3 part tune, which works really well played quite slowly.

Once we’d got the notes, we decided on some embellishments for the tune. Here’s what we came up with.

A part:

  • hammer-on, from a B to the C#
  • a grace note on the top F#
  • adding dynamics t the top F#
  • adding a chord with an open A, to the final F#

B part:

  • Making the notes in the run up (A,B C#) staccatto
  • adding dynamics to the top F#
  • adding vibrato on the last F#

C part:

  • adding bowed slurs
  • sliding into the top F#

We worked on the bowing hand, thinking about flexibility in the fingers. We played around some more with holding the bow up vertically and using the individual fingers to move the tip of the bow around. We noticed that when one finger moves (in order to move the bow tip), another has to respond to the bow, to allow the bow movement to happen. We played around with the vertical bow for a while, using the thumb as a pivot, and moving the tip in different directions, and noticing the impact that bow movement had on the other fingers in the hand. When we’re playing , having a similar fluidity in the bowing hand will help us to be able to control the bow without needing to have a rigid grip on it.

We tried out playing a long F# (on the D string), thinking abut how the fingers were moving independently on the stick of the bow, keeping it perpendicular to the strings. We played the F# on a long down bow, over a count of 4, then lifted the bow for a count of 4. We played round this pattern together, paying attention to keeping in time with each other. Then we moved on to playing 4 separate notes on the 4 beats. We tried out playing the 4 beats as staccato notes, again paying attention to playing the start and end of each note in time with one another.

We also briefly looked at using the 4th finger. It can be tricky to get notes sounding confidently in tune with the 4th finger. This is partly because we rarely use the finger in day to day life, so it’s considerably weaker than the other fingers. We played an E on the A string using the 4th finger, and checked ur tuning against the open E string. Ding this for a few minutes each day, even for just a week, will make a big difference to the strength on the 4th finger, and help make us more comfortable with using it.

We also revisited the steps to playing with vibrato. I’ve added a new page to the website under the ‘basic techniques’ section, with details of the steps to learning how to play with vibrato,. It includes a video that shows all the steps in some detail.


Adding embellishments to a tune
Photo ©Ros Gasson


How to play snaps in strathspeys

How to play snaps in strathspeys

In the class last night we learnt the strathspey Iomadh Rud Tha Dhith Orm. This is a Gaelic song, and the title translates as ‘There are Many Things I would need’.

We spent the evening working on our bowing arm and hand tonight, to help play the snaps in this tune crisply, and with a real sense of conviction.

We started off by getting the wrist/hand of the bowing arm really relaxed. We shook out the hand, and let it hang naturally down by our side. We spent a moment feeling how relaxed the hand was in that position. It’s possible to play with this level of relaxation in the bowing hand. Then we brought the bowing hand up, and placed the bow into it, maintaining that same level of relaxation in the hand.

We worked on the hand action for creating a snap in a tune. We played the two notes of the snap on two separate bows – a down bow followed by an up bow. The down bow needs to be a short sharp fast bow stroke. Imagine you’re trying to throw your bow away from you, then stop hand dead. Doing this with a relaxed wrist allows the hand to ‘bounce’, which changes the bow direction from the down bow to the up bow.

We also revisited getting our fingers mowing in relation to the bow, repeating the exercise from a couple of weeks ago where we made circles with the frog end of the bow.

We played BdBdBdBd round and round (with a down/up bowing pattern), lifting the bow after the up bow on the d. We used the pinkie to take the weight of the bow as it lifted from the string. As soon as the bow returned back onto the string, we let the pinkie relax, in between each lift.

We put the tune onto a set: Iomadh Rud Tha Dhith Orm, the Placebo, and The Barrowburn Reel

We finished off the evening by playing the strathspey together again, focusing on listening closely to one another, and working on playing the notes crisply together. this identified that while the A part of the tune worked well, the timing was trickier on the B part. Once we’d played round the trickier sections a few times, it was much easier to play it together in time.

Here’s a recording of Fiona Kennedy and Karen Matheson singing Iomadh Rud Tha Dhith Orm. Have a listen to the second song too!

Shetland bowing patterns

Shetland bowing patterns

We started off tonight’s class by working on our bow control again. We each held our own bow in front  of us, using our usual bow hold. We used a little pressure with the little finger on the frog end of the bow to take the weight of the bow and lift the tip, so the bow lifted into a vertical position. Releasing this pressure with the pinkie allows the bow to return to a horizontal position. While we were repeating this action, we focused on the fingers in the bowing hand responding individually to the movement of the bow in the hand.

We repeated the exercise where we made the bottom (frog end) of the bo0w move in a small clockwise circle. The bow should pivot round the thumb, making the tip move in a much bigger circle. We used the fingers to get the circle action happening noting again that the fingers move independently of one another to control the bow. Then we changed direction to anticlockwise.

We learnt the Barrowburn Reel, by Addie Harper, and spent some time working on Shetland bowing patterns in the A and B parts. In the A part, we were using the 3 up 1 down pattern, which emphasises the off-beat. In the B part, we used a 1 down 3 up pattern, emphasising the  on-beat. We also tried out some chords and grace notes in both parts of the tune

We focused for a while on a simple short phrase from the B part of the tune. We played it with a clear emphasis on the on-beat. It’s important when working on playing more precisely to be quite sure of exactly when the note should start, and making that start point clear and crisp. play it with conviction!

At the end of the evening, we spent time playing together as a group again, focusing on listening to folk on either side, and playing in time with them

We played the Strathspey form a couple of weeks ago in a set with tonight’s reel. We’ll learn another Strathspey next week to make longer set.


Here’s an interesting article on effective practicing

Bowing patterns in reels
Photo ©Ros Gasson

How to keep your bowing hand relaxed

How to keep your bowing hand relaxed

Tonight we worked on keeping the bowing hand really relaxed while playing, and focused on getting the fingers to become responsive to the stick of the bow. Have a look at Ian Walsh playing at the start of this video, and watch the fingers in his bowing hand. You’ll see that his right hand is very relaxed, and his fingers are moving around, interacting and responding to the stick of the bow. You can click on the gear symbol o the bottom right of the video and change the settings to slow the video down so you can really see how much his fingers are moving in relation to the bow.
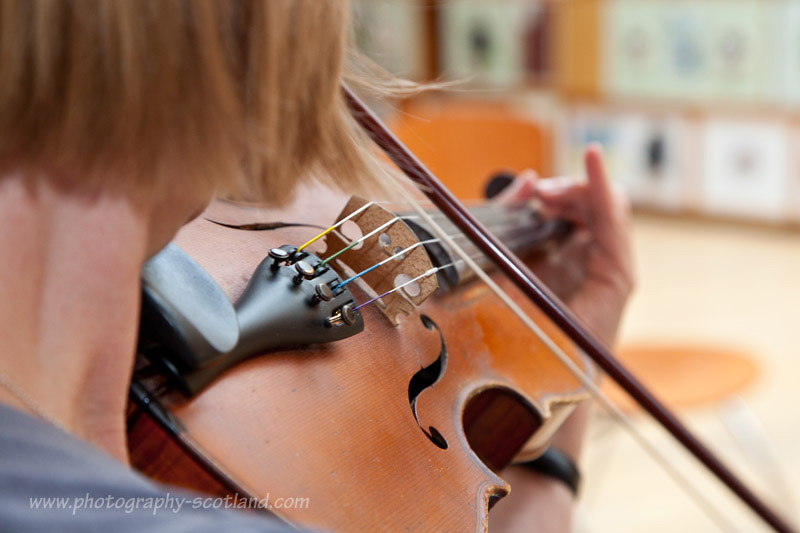
Flexible fingers

This is what we worked on tonight. We’re aiming to get the right hand relaxed, and allow the fingers to move individually in response to the bow moving. The fingers work to keep the bow moving in a straight line throughout the bow stroke, and the first finger and the pinkie will also be used to increase or reduce pressure on the bow.

We started off by holding our bow horizontally in front of us (with the frog on the right, and bow tip to the left), holding the bow with our usual bow hold.  Letting the thumb act as a pivot, we used pressure on the pinkie to raise the tip of the bow up until the bow was vertical in front of us, then gradually relaxed the pinkie pressure to let the bow come back down to the horizontal position in a controlled manner.

We also tried  holding the bow vertically, and making the bottom (frog end) move in a small clockwise circle. We were aiming to get the bow to pivot round the thumb while we did this, making the tip move in a much bigger circle. We used the fingers to get the circle action happening. Then we changed direction to anticlockwise.

We tried playing round the notes A B C D, playing on long single bows (starting on a down bow). On each down bow (The A and the C) we also played an open percussive D string. We used our first finger to achieve this – as the bow reaches the ‘tipping point’ in the bow stroke (above the middle of the bow length), we let it drop to hit the open D string, giving a wee push with the first finger at the same time, so it ‘digs in’ to the string. As soon as the bow hit the D string, we relaxed the hand, allowing it to almost bounce back off the open D, which let the D ring out. We worked in pairs, so we could give each other feedback on when it was working.

We played a short riff D E G G using the bowing pattern D – down, E – up, G – down, [lift bow] G – down. We worked on using the pinkie to take the weight of the bow as we lifted it off the strings, and focused on making sure the pinkie relaxed again as soon as the bow returned onto the string.

Then we tried string crossing, playing from from an open A to an E (first finger on the D string). Rather than arm movement, we were aiming to use a combination of wrist and fingers to move the bow from one string to the other. We worked on keeping the vertical movement of the tip of the bow to a minimum. To do this, we were only moving the bow just clear of the A string when we were playing the E, and only just clear of the D string when we were playing the A. Being able to switch between strings confidently with minimal movement makes a big difference when trying to play faster tunes.

We played a D scale starting on the open D, and playing up to the 3rd finger d on the A string. Starting on the 3rd finger D, we played back down the scale again. (So we were playing 8 quavers on the way up, and 8 on way back down, equivalent to 2 bars played in reel time). We played this using single bows, and emphasised all the on beats (on down bows).  Then we shifted to emphasising all off beats (also on down bows).  We worked on tapping a foot just on on beat all the way through. It’s helpful when tapping your foot to have some sort of distinction between what you’re doing for the on and off beats. as you start to play around with rhythms in tunes, it makes it easier to be clear where the on and off beats are if we are doing different things for each. You can try tapping the other foot on the off beat, or tap your heel and toe alternately for the on beat/off beat, or tap your foot on the beat, and lift it on off beat. Try to find a way that works for you that distinguishes between the taps on the on and off beat. After this, some of the class played a harmony to the scale (starting on the D when the people playing the scale were playing the F#). The people playing the harmony tried shifting from emphasising the on beats to the off beats.

We played through the reel  we learnt last week, while some people were clapping on the beat in the A part, and on the off beats in the B part, which mirrored the bowing and emphases we were using in the tune. Then the people clapping tried clapping on the off beat in the A part, and the on beat in the B part.

And now here’s a wee bit of light relief!

Creating space in tunes

Creating space in tunes

Learning to have good control of the fiddle bow will allow you to create space in tunes, either between phrases or between individual notes. The spaces can help with phrasing, or allow a run of notes to be broken up a bit.

Vertical movement of the bow

We started off this evening by working some more on harnessing the vertical movement of the bow. We each held our bow out in front of us, supporting the tip with our left hand. We tried out the action of the first finger pressing into the stick of the bow, using the thumb to counter this movement.  We alternated this with relaxing the hand, then tried doing the same thing while moving the bow through a short bow stroke (still with the bow in front of us, without the fiddle). We then tried this out on the fiddle, playing single bowed open Ds to start with. We broke into pairs, so that we could give each other feedback on the bow movement, and whether the stick was compressing down onto the back of the hairs at the start of the bow stroke. Then we tried the same thing out playing alternate Ds and Es on single bows. We worked on keeping the hand really relaxed as soon as we had created the pulse at the start of the note. As we play the note, we’re aiming to take a little of the weight of the bow in our hand (by pushing lightly on the top of the stick with the pinkie). his allows the bow to naturally ‘bounce’ out of the note. Depending on how much of the weight we take, the bow can bounce a little or enough to come clear of the string for a brief moment. When the bow comes clear of the string, it creates a very short space between the end of the note and the start of the next note.

Bowing patterns

We learnt the reel Paddy’s Trip to Scotland. We worked on creating a basic ‘default’ bowing pattern which will eventually happen naturally without having to think about it. We’re aiming to start each bar with a down bow, as this will naturally give a pulse on the beat in each bar. Once this pattern is established in our playing, we can vary it whenever we chose to, to create an emphasis in different places in the bar. in this tune, we’ll be putting the emphasis onto the offbeat on the B part, using a ‘3 up 1 down’ bowing pattern for several of the phrases.

We finished the evening by playing together in a circle, focusing on listening to the players on either side of us


Playing with precision

Playing with precision

We spent more time tonight on thinking about playing with precision, and how to use control of the bow to achieve this. At the start of the evening, we briefly revisited the bow hold. It’s important that the bowing hand has a comfortable position, where it can be completely relaxed throughout the full length of the bow stroke. We tried giving our bowing arm a good shake out, and let it dangle by our side, being aware of how relaxed the hand is in this position. We’re aiming for that same relaxation when we pick the bow up. Once we have established a comfortable bow hold, the fingers need to be able to move with the bow, minutely adjusting throughout the full bow stroke, to keep the bow moving in a straight line.

A fiddle player's bow hold, seen from underneath
Photo ©Ros Gasson

We played some long open notes, paying attention to keeping the hand and all the fingers completely relaxed.

Vertical movement of the bow

We then worked on developing our control over the vertical movement of the bow during the bow stroke. Using the centre of the length of the bow, we worked on using the index finger to dig in at the start of the note . The stick of the bow pushes down towards the bow’s hairs at the start of the note when you have this right. At that same moment, the weight of the arm is transferred through the elbow and wrist into the bow, helping us to really ‘dig in’ to the note to give it a clear start point. We then immediately release the pressure with the first finger. If the hand and fingers are completely relaxed at this point, it allows the natural springiness of the stick of the bow to straighten the bow out again, lifting the bow slightly upwards from the strings. It’s possible to use fine control of the amount of pressure used on the bow to control whether the bow lifts right off the string or not at this point. Lifting it just clear of the string will create a tiny space in between individual notes, giving the music a sense of ‘bounce’, and also making each note sound crisp, with a very clear start and finish.

This video shows the action of the first finger on the bow quite clearly

We played through the waltz from last week, and spent some time working on using our bow control to ad expression. We focused on the longer notes, and used bow speed to add an emphasis towards the end of the note. Doing this created a bit of a ‘swing’ to the tune.

We then learnt a new tune – a short strathspey called ‘The Placebo’. (The written music is on the music page).

We tried out playing the strathspey using control of the bow to create some spaces in the tune.

We ended the evening by playing the waltz through a few times again. We played it standing in a circle, without looking at our own hands, and playing it for the person straight across the room. Then we tried playing it while focusing on listening to the 2 people on either side of us – this made a huge difference to how the group played – it was more in tune, and we were much more in time with one another. It felt much more cohesive. We tried out playing the tune again, and this time watching the person to our right. Several people noticed that when they did this ist was hard to focus on listening as well.